MySql
This section shows various MySQL tutorials.
Installation
Windows
-
Download mysql-installer-community-8.0.23.0.msi from https://dev.mysql.com/downloads/installer/
-
Download MySql image::mysql/windows/download-mysql.jpg[600,600]
-
Open the installed file and in the installer select Developer Default and click on next
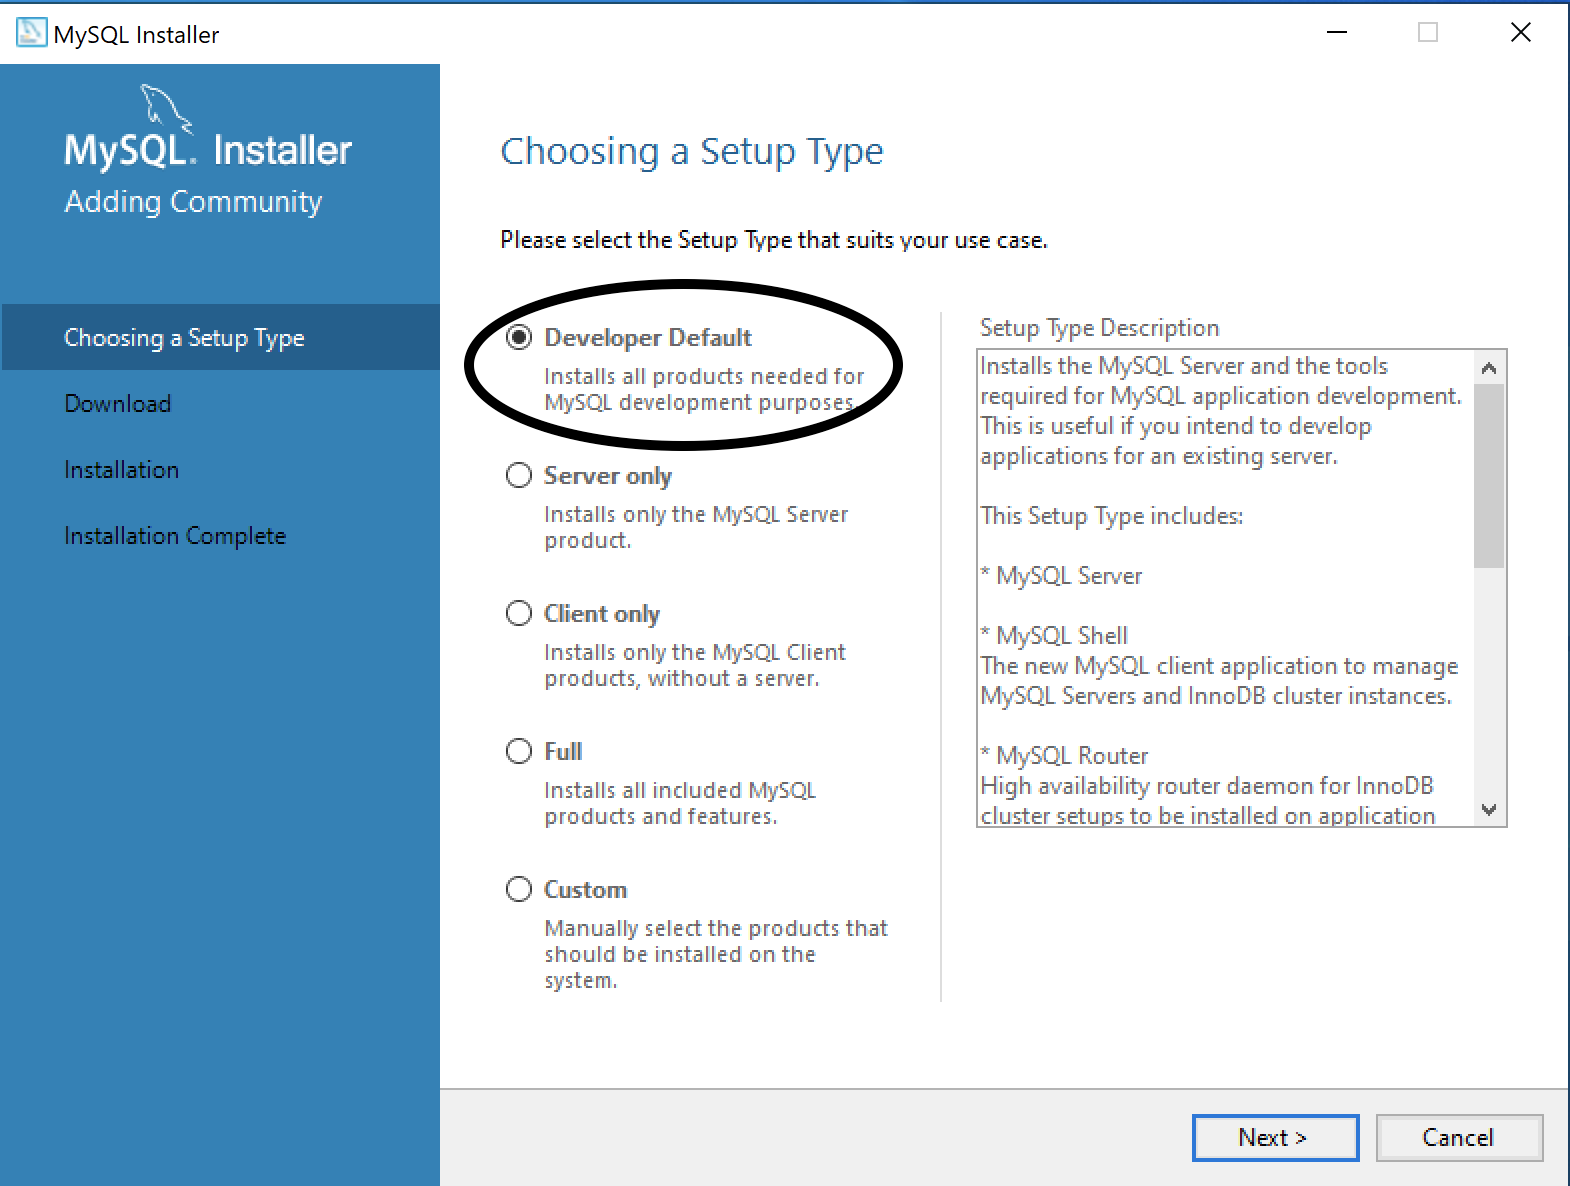 Figure 1. Setup MySql
 -
In the check requirements tab, click on execute
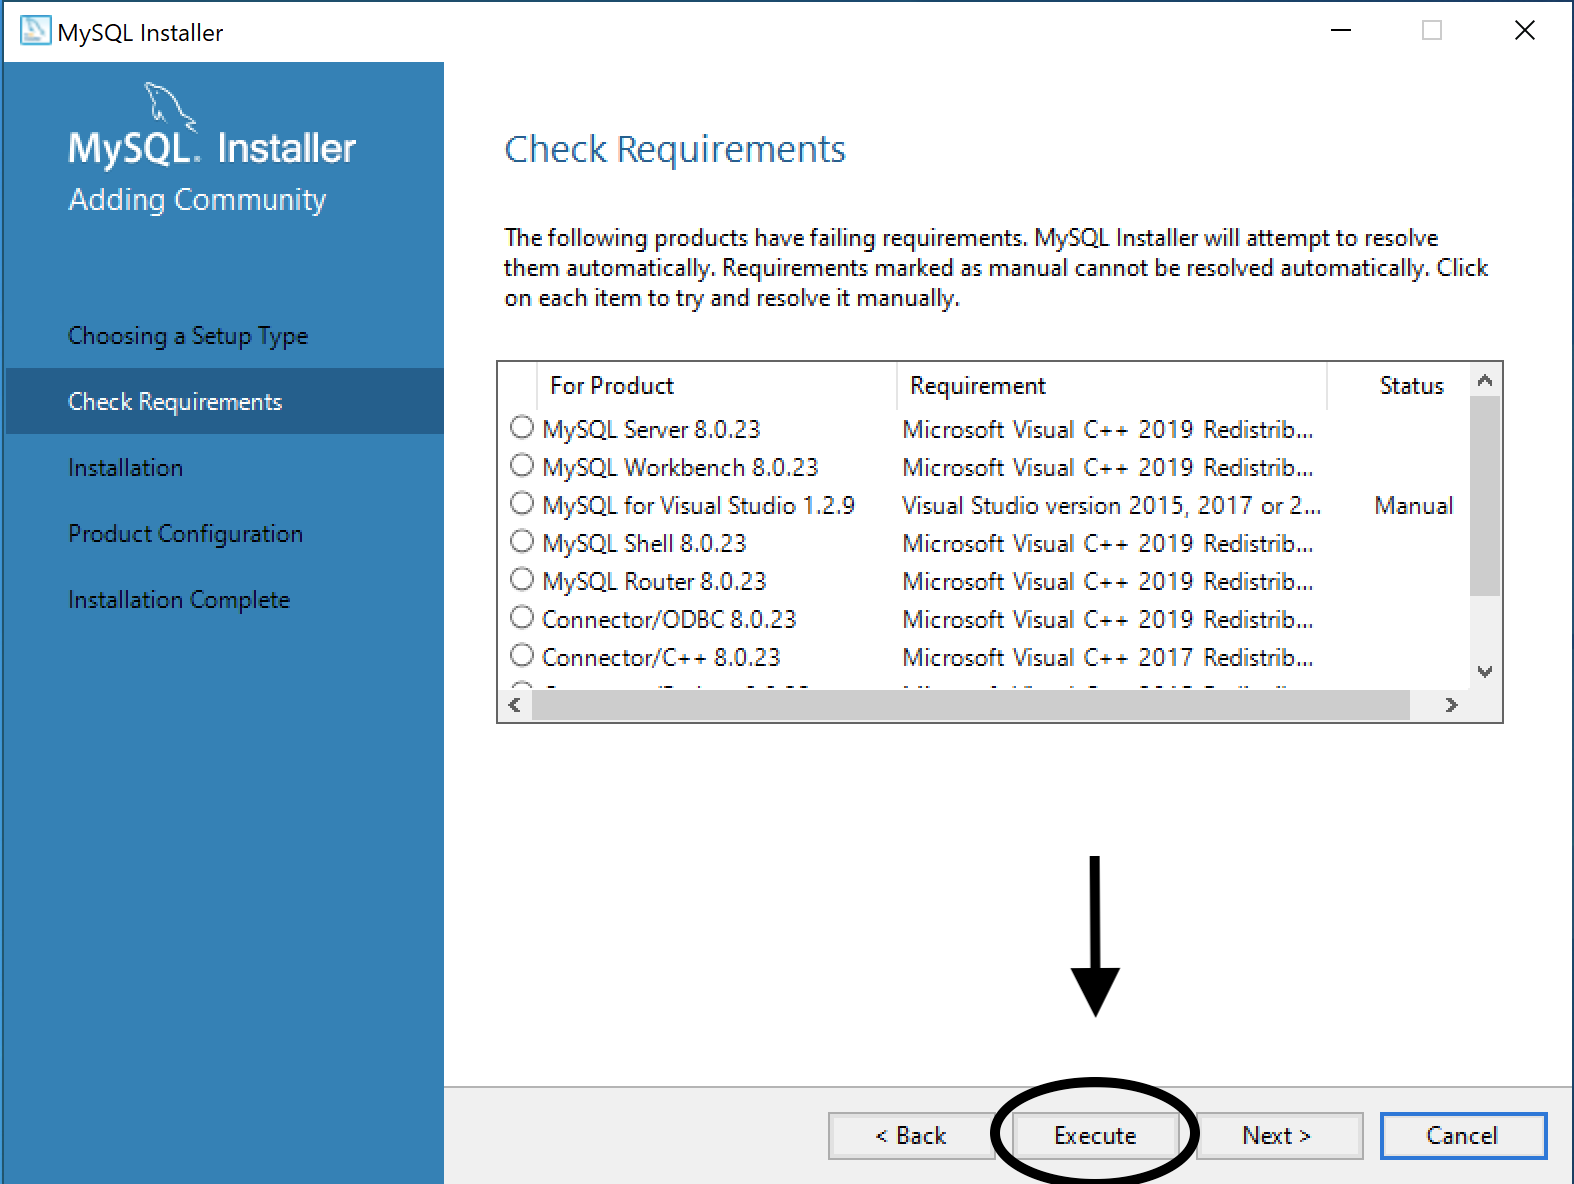 Figure 2. Download MySql Requirements
 -
After downloading the required requirements, press on next to install it.
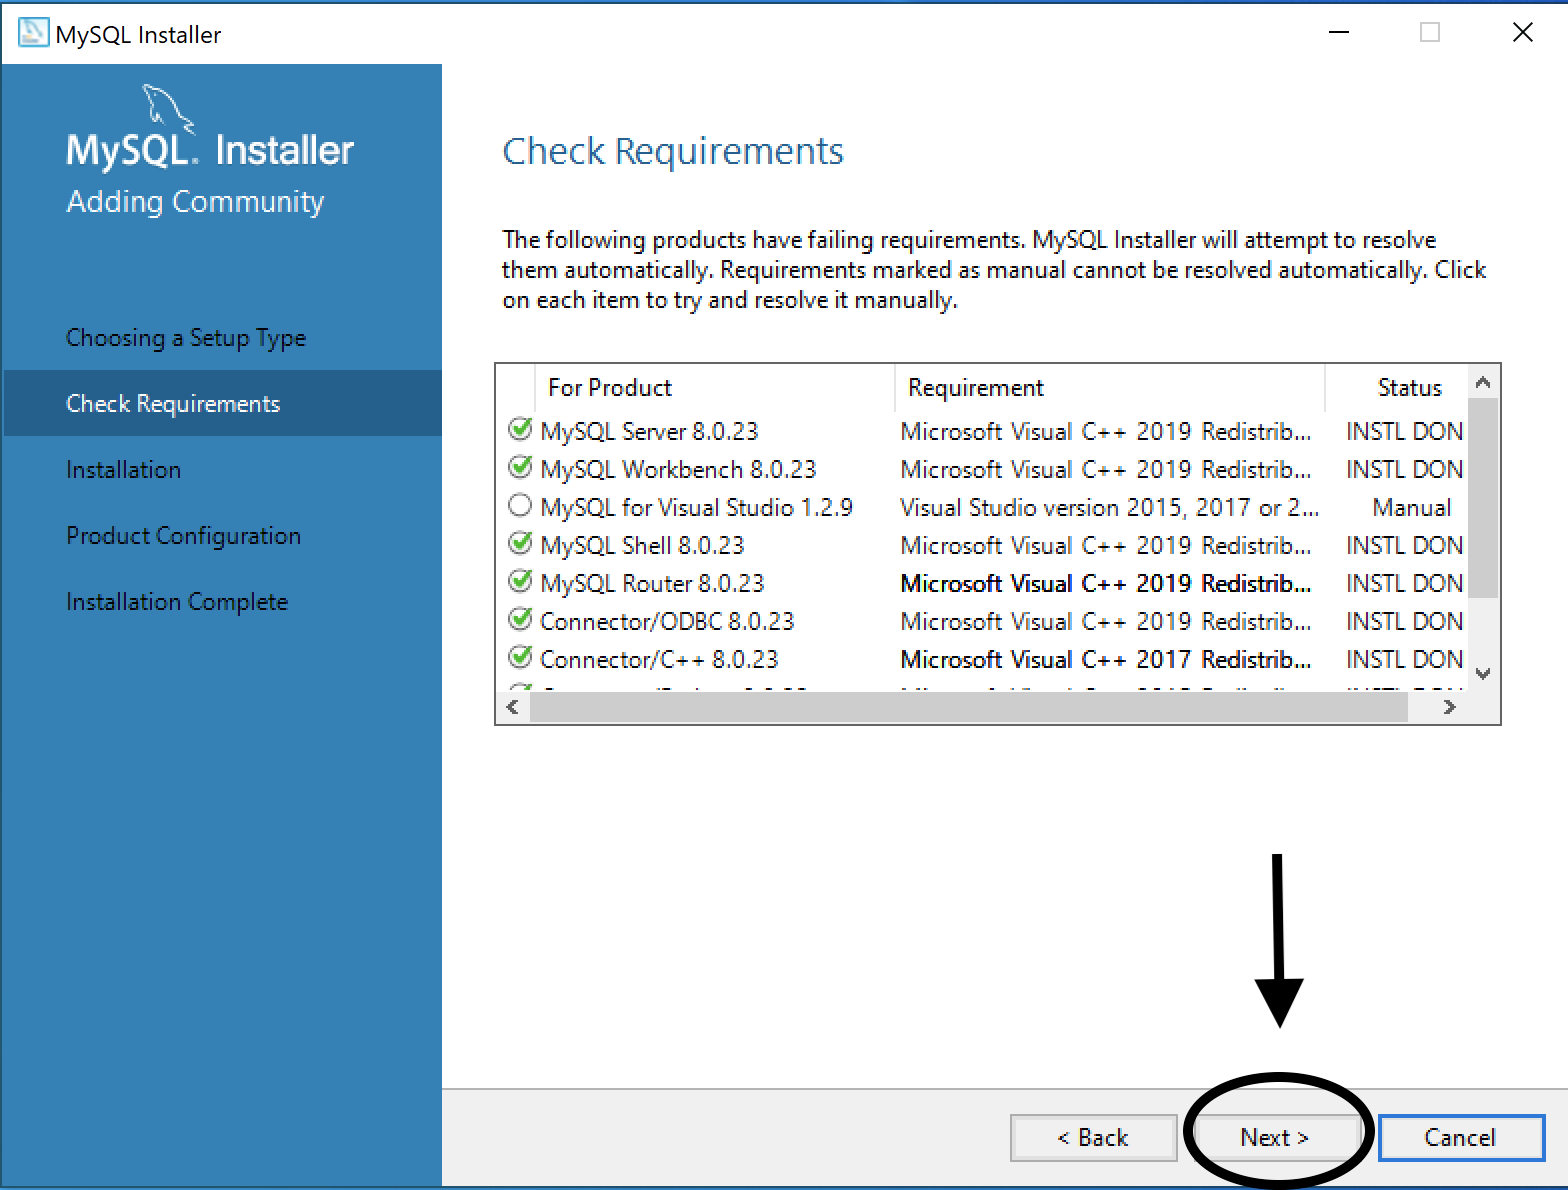 Figure 3. Install MySql Requirements
 -
Now press on execute to install the required products
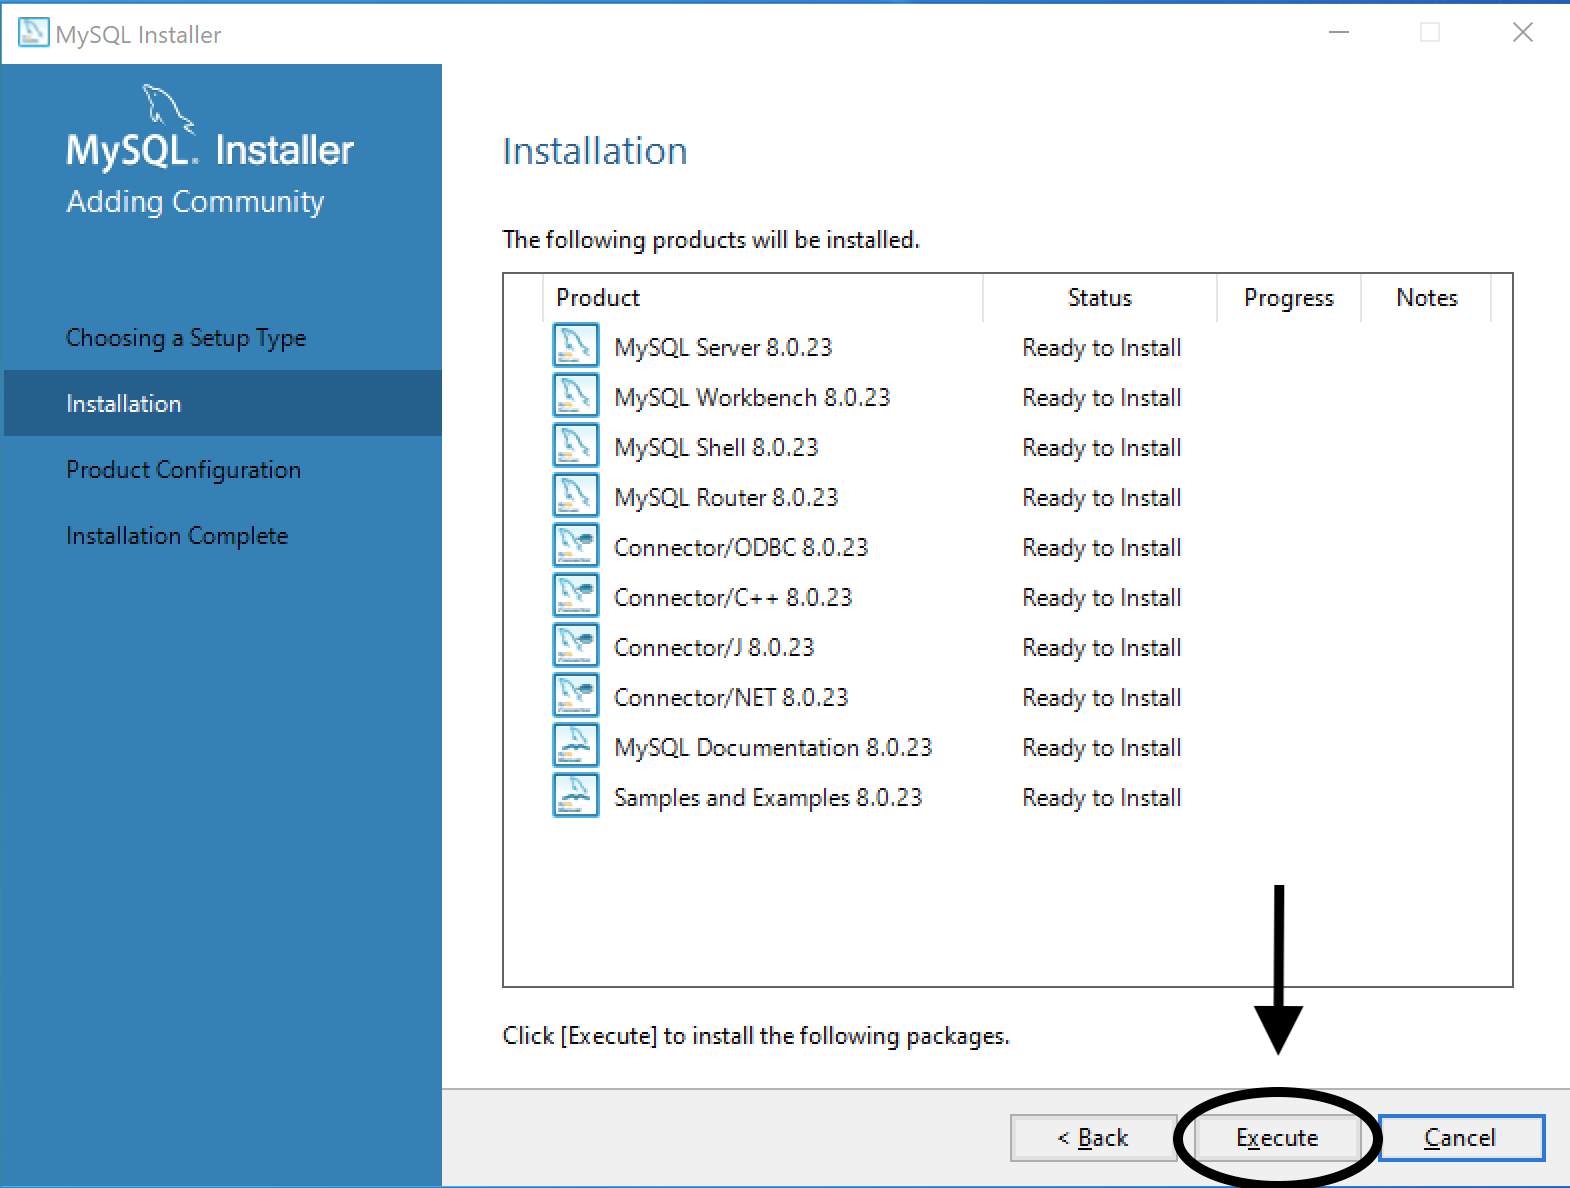 Figure 4. Install MySql Products
 -
Once the installation is complete click next.
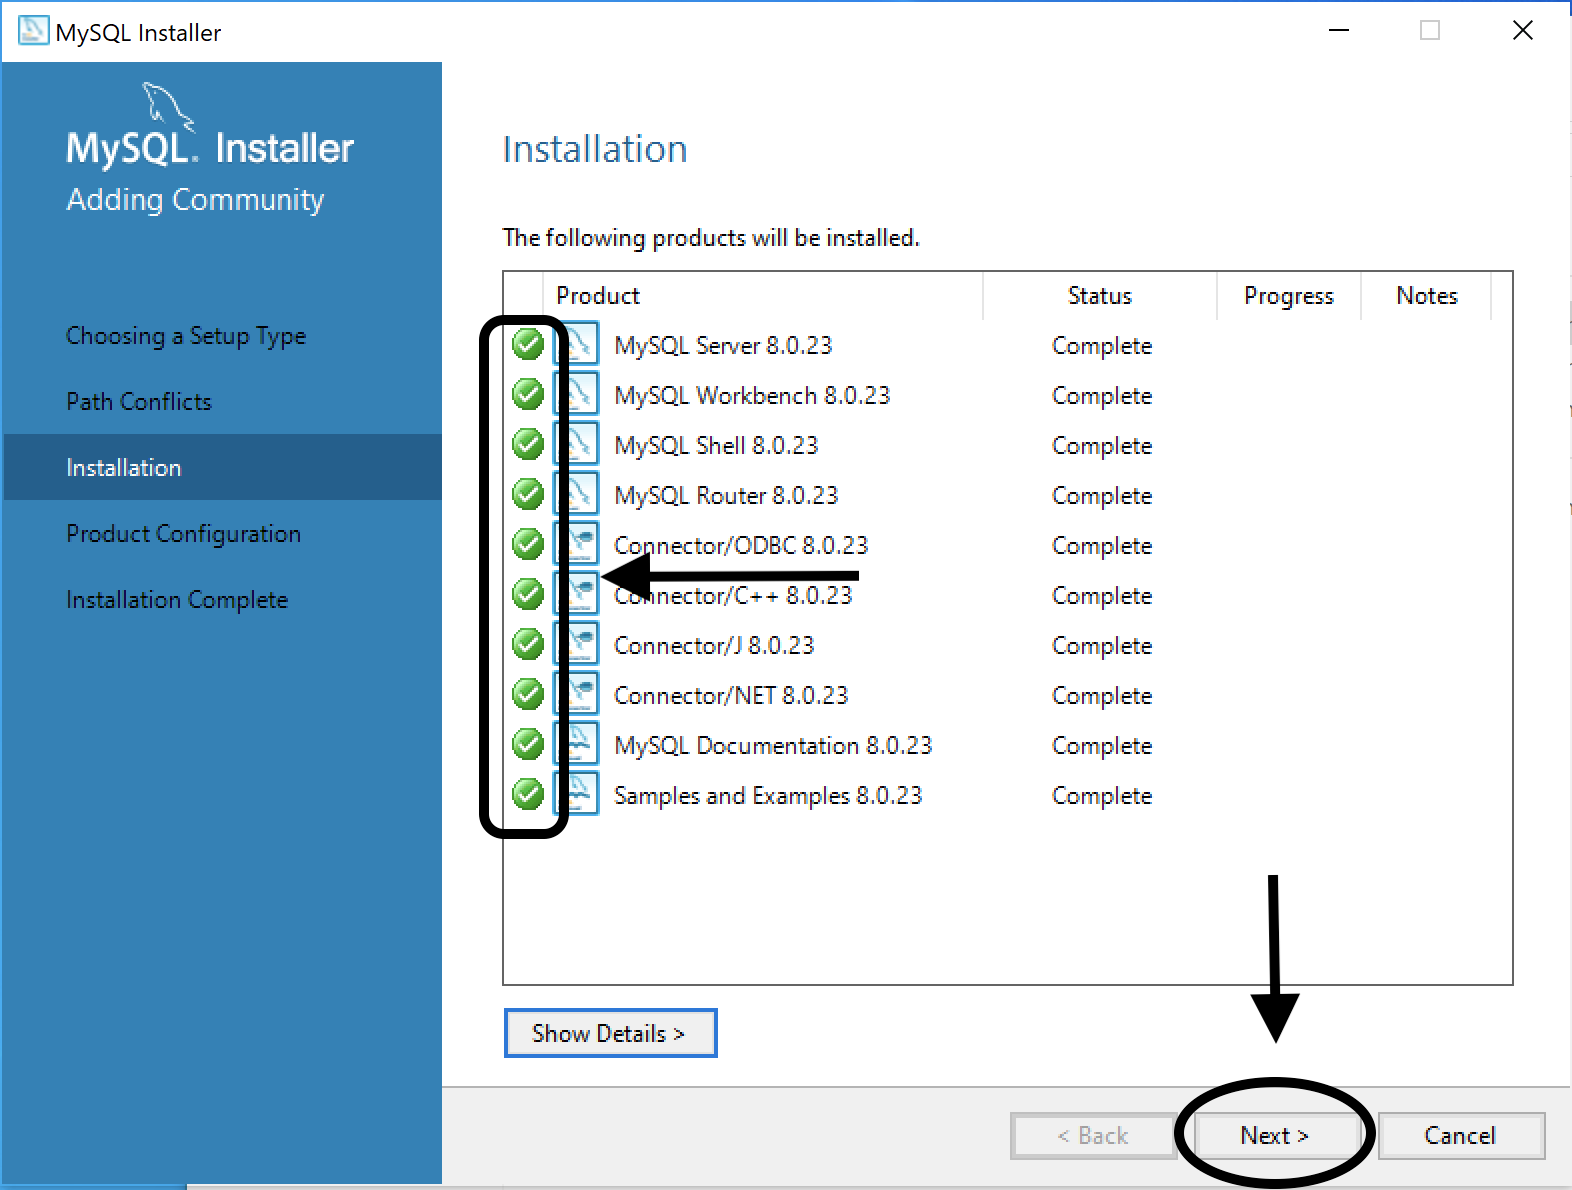 Figure 5. Complete installation
 -
In the Product Configuration press on next to input the configurations, and you will get the following screen:
Leave the default configurations for the following screens (Type and Networking and Authentication Method). 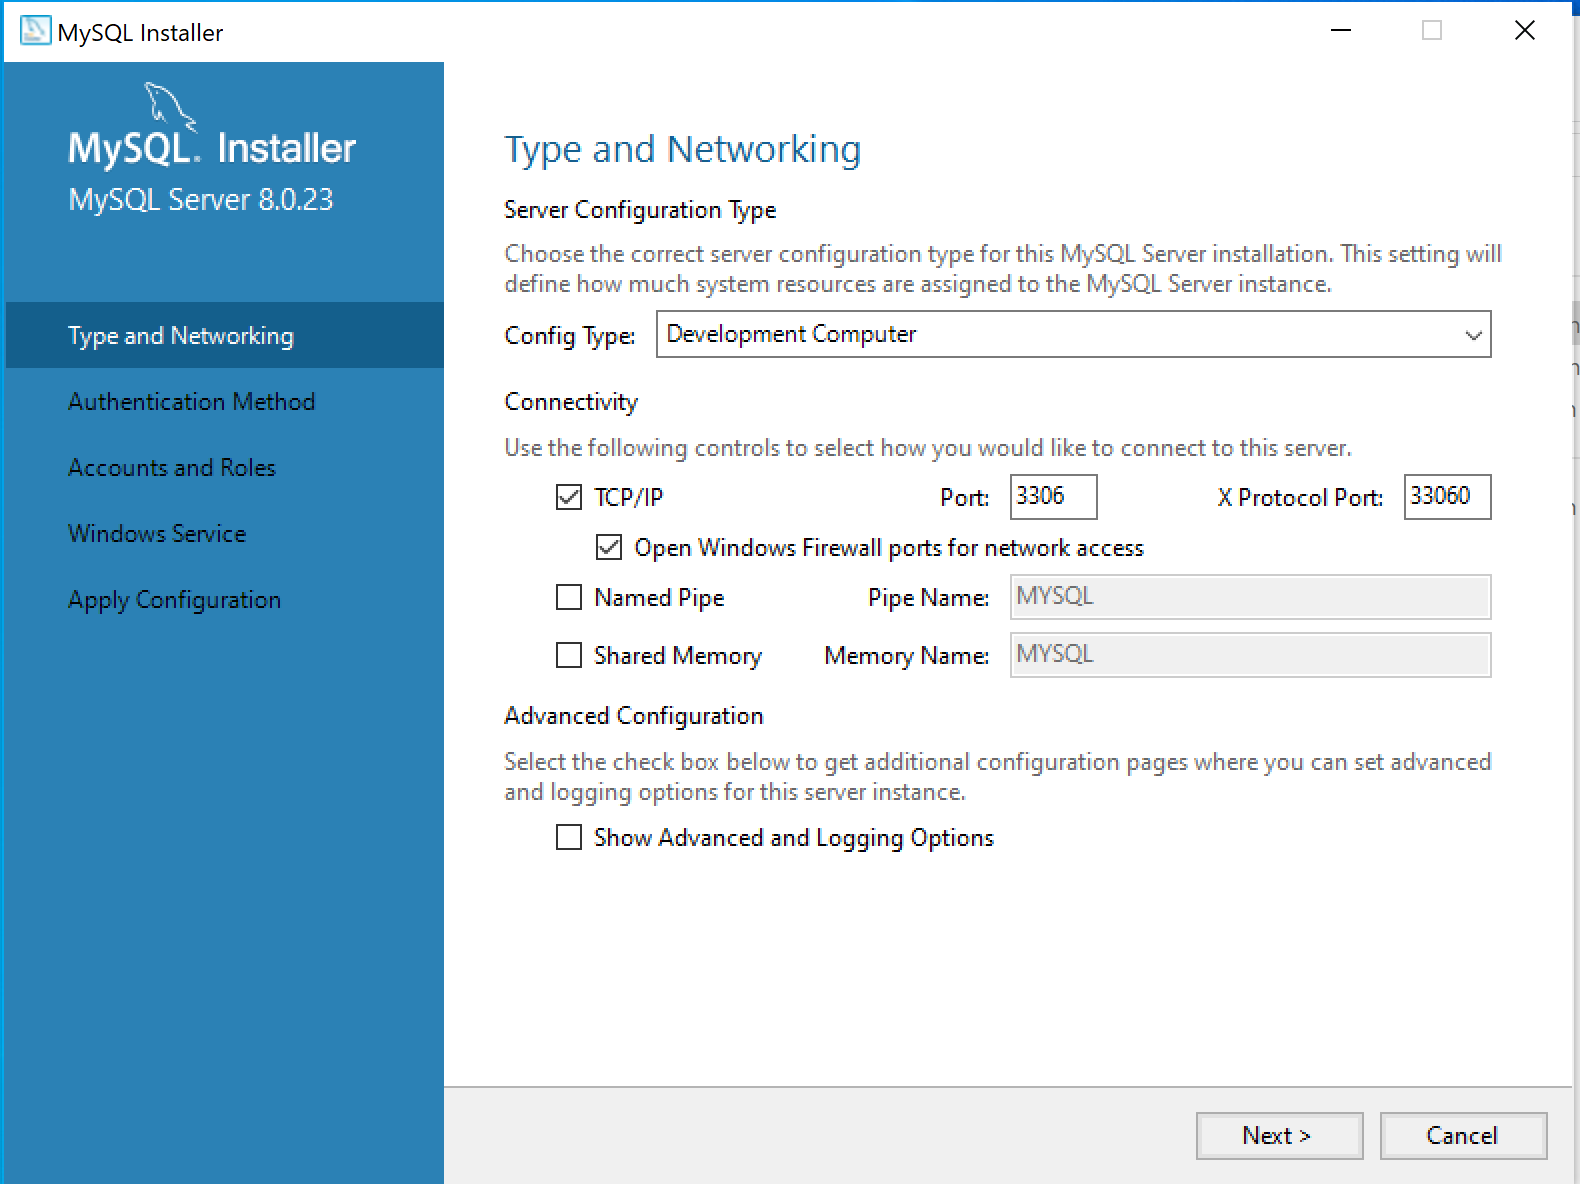 Figure 6. Type and Networking
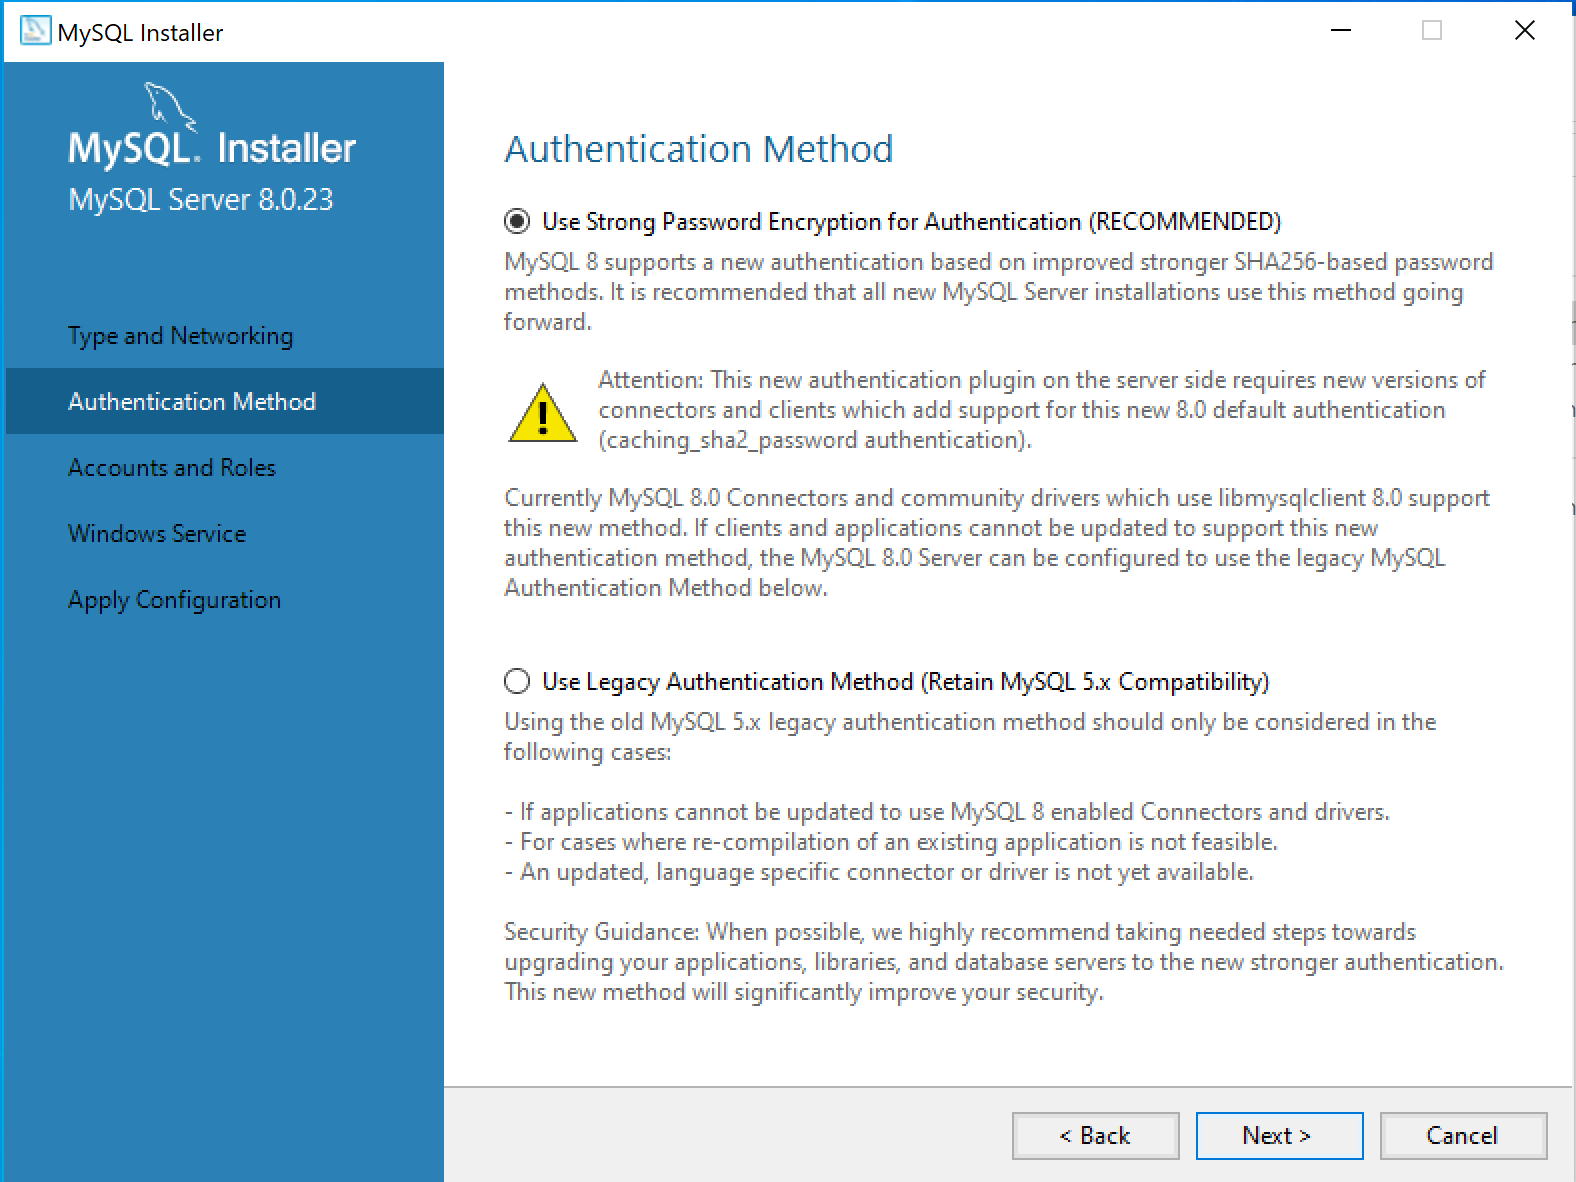 Figure 7. Authentication Method
 -
In the Account and Roles tab, enter a password for MySQL server and press next.
If you need to connect to the database server from other machine, press on add Add User and give it a user name and password with the default selected configurations. 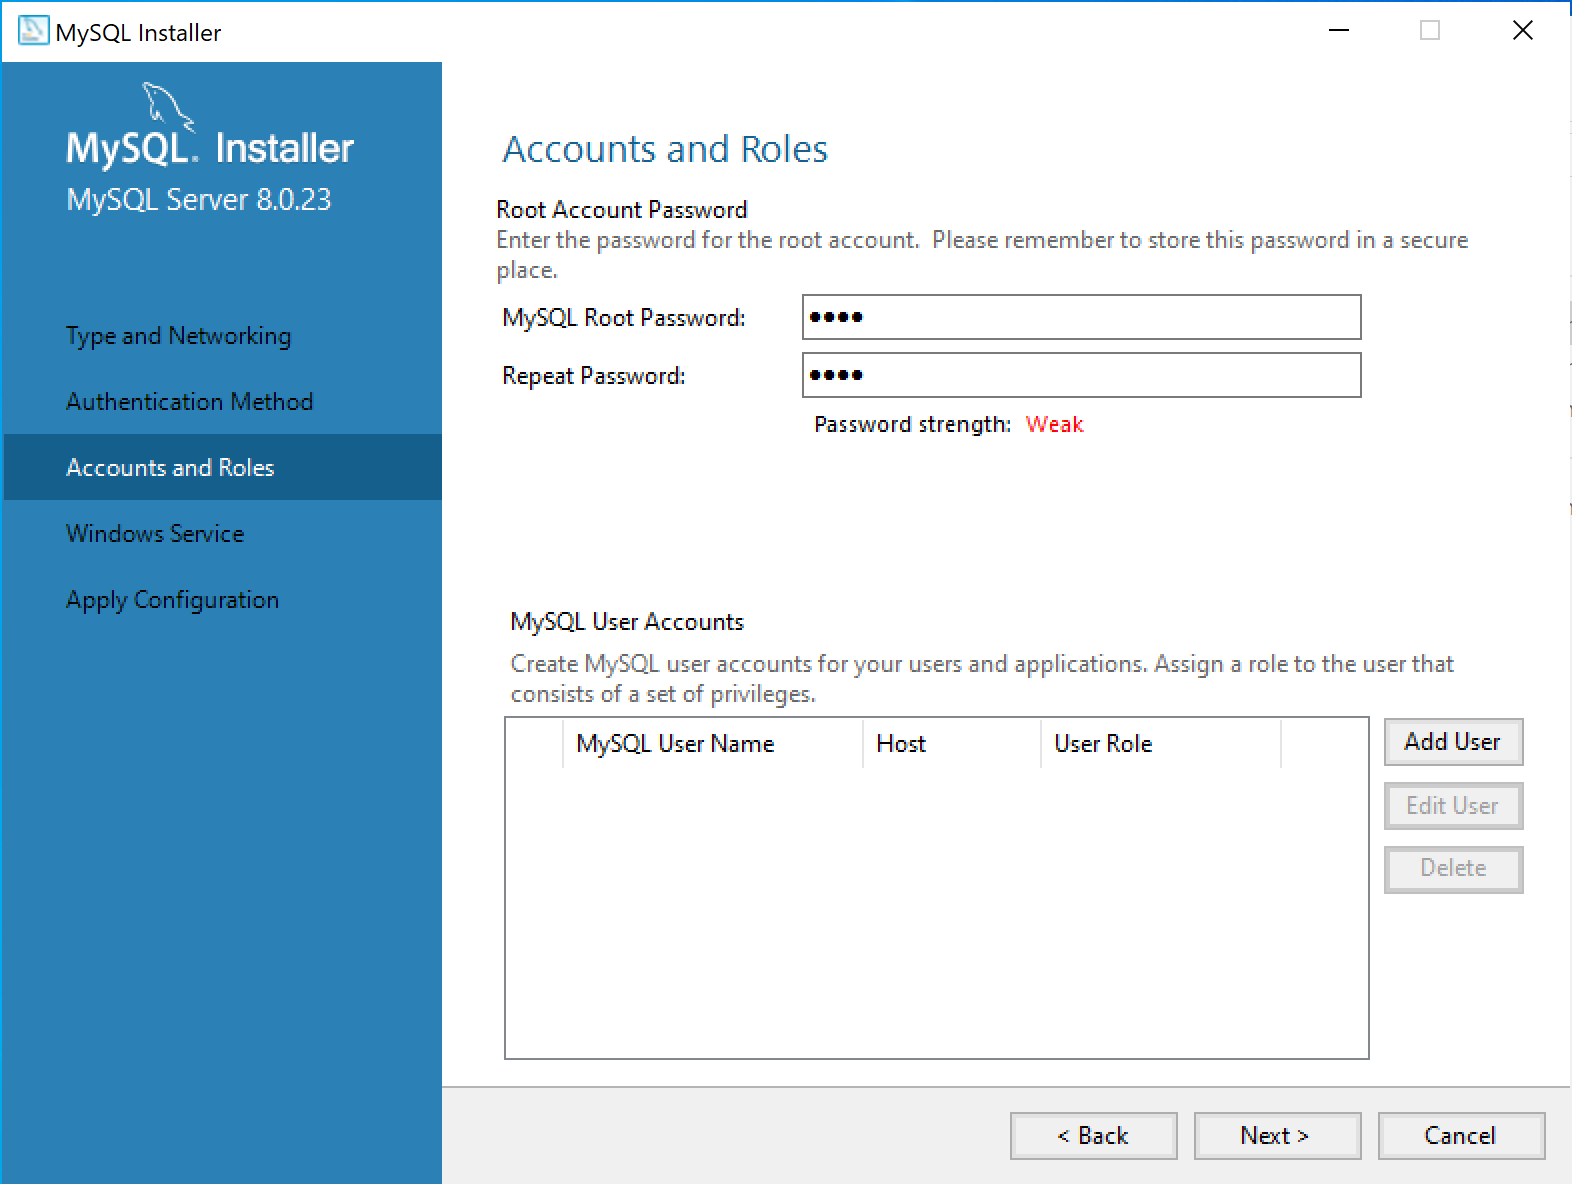 Figure 8. Account And Roles
 -
Once finished setting up the Accounts and Roles, the Windows Service tab will open and you can change the MySQL service, its recommended to leave the default configurations.
 Figure 9. Windows Service
 -
Finally we want to apply the configurations that we configured, so in the Apply Configuration tab, press on execute then finish
 Figure 10. Execute Config
 -
After completing the configurations, it will take us back to the product configuration tab in the main installation window, press on Next to finish the installation.
-
A new window should pop-up to test the Server connection, enter your username and password then click on Check, if the connection was successful you should see a green tag in the status column saying Connection Succeeded, now press on next
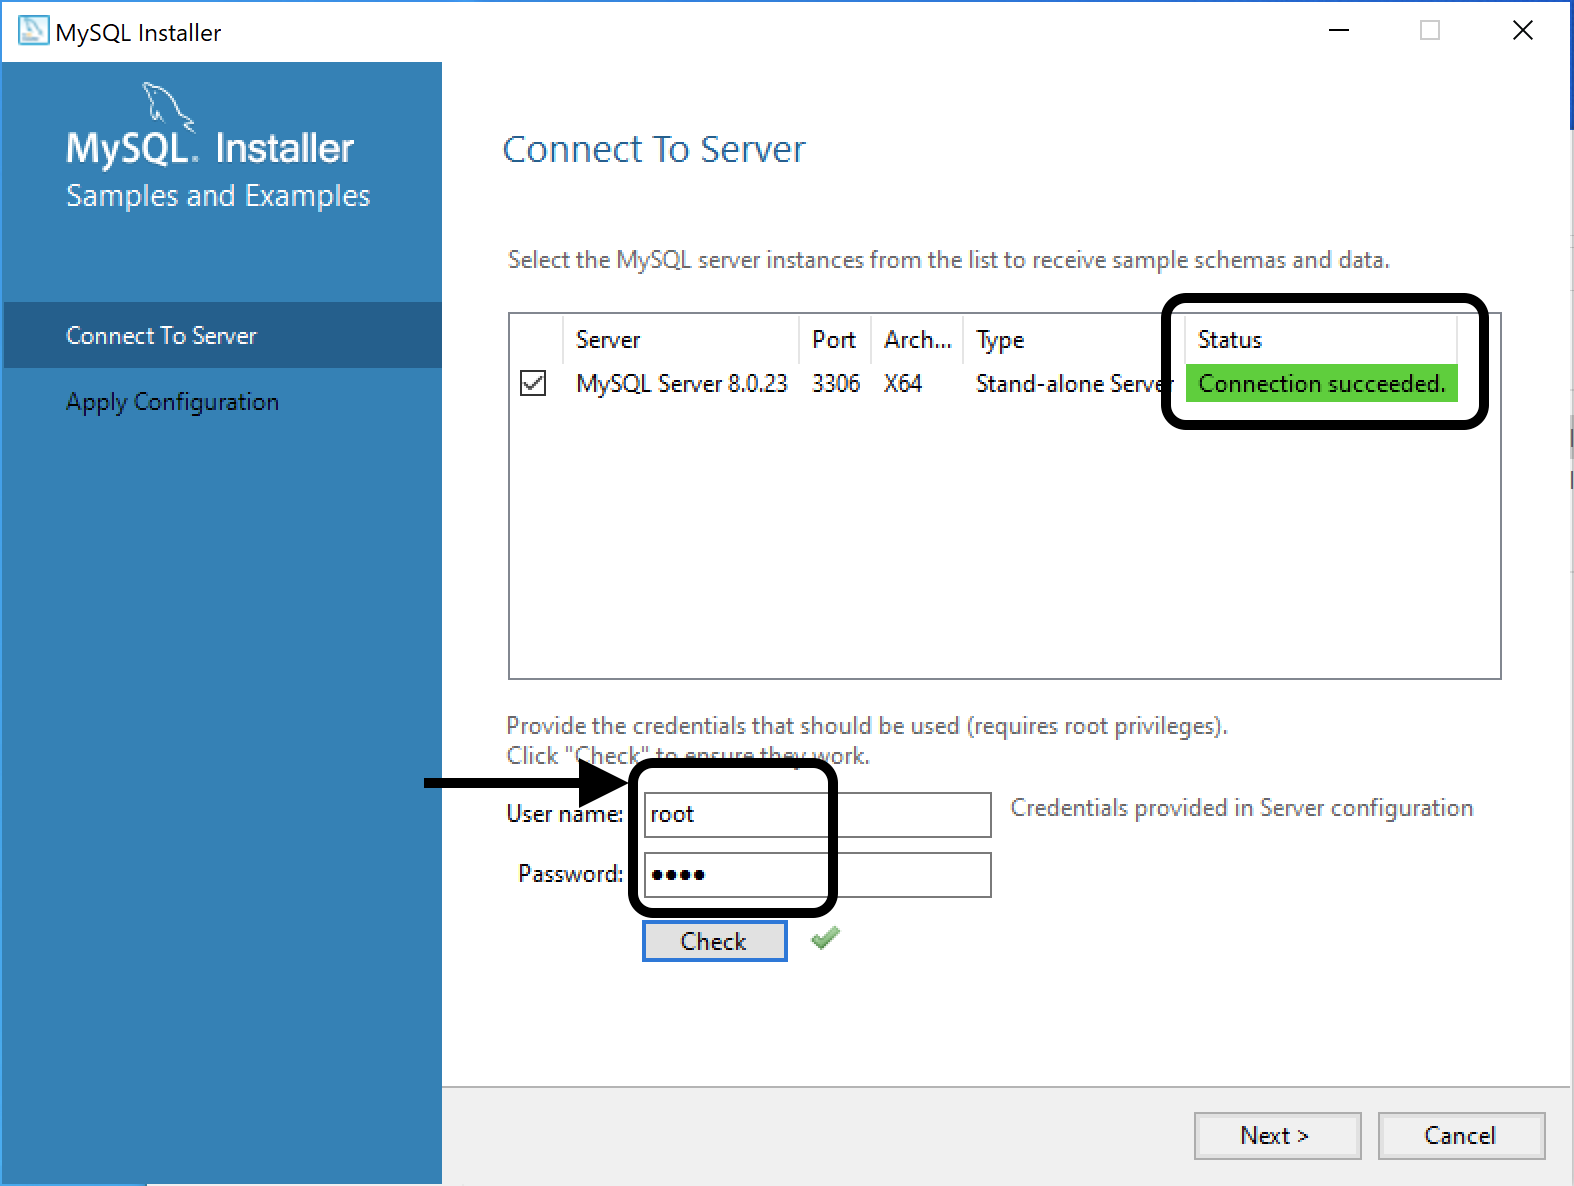 Figure 11. Execute Config
 -
Now we have the service up, running and tested we can press on execute in the Apply Configuration tab to execute all the changes, then press on finish
-
This will take you back to the main installation window with everything set up for you, so to finish the installation press on next then finish.
-
Now you have MySQL ready to be used.
MacOS
-
Select Operating System as macOS
-
Choose macOS 10.15 (x86, 64-bit), DMG Archive
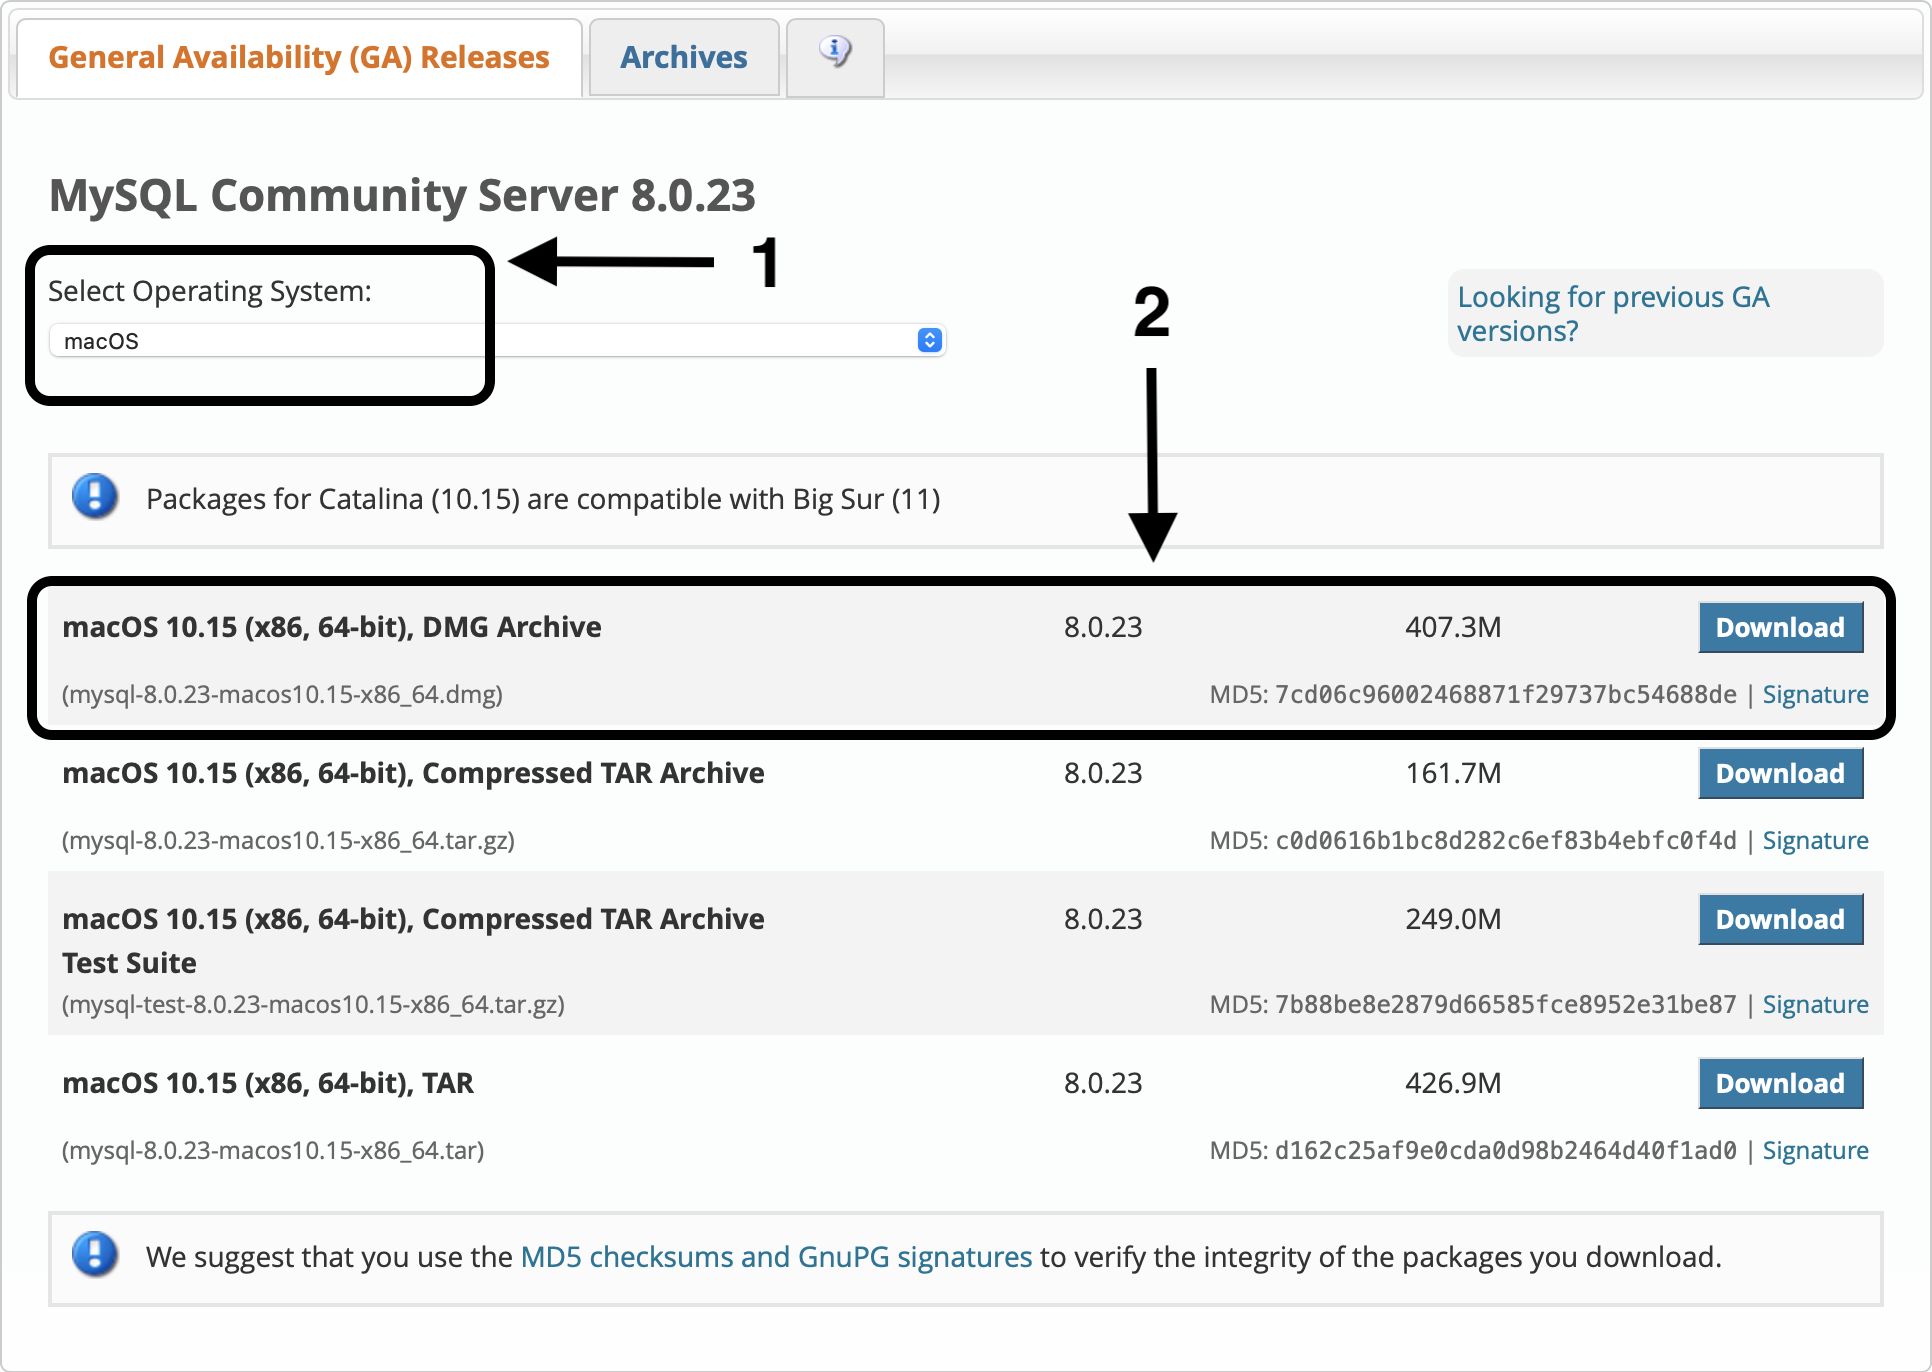 Figure 12. Download MySql Mac
 -
Open the installed file, and double click on the installation package to install it
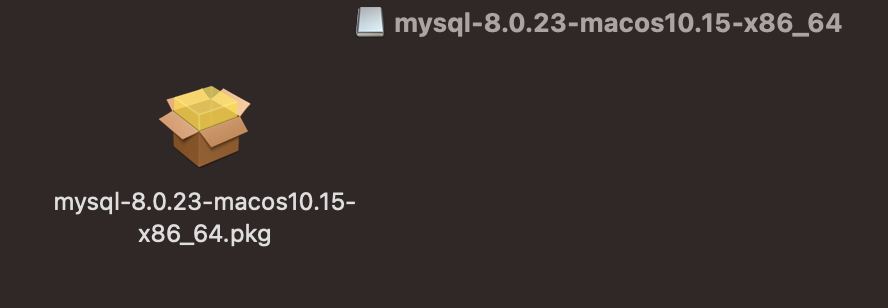 Figure 13. MySql Mac Installer
 -
The installer wizard should open
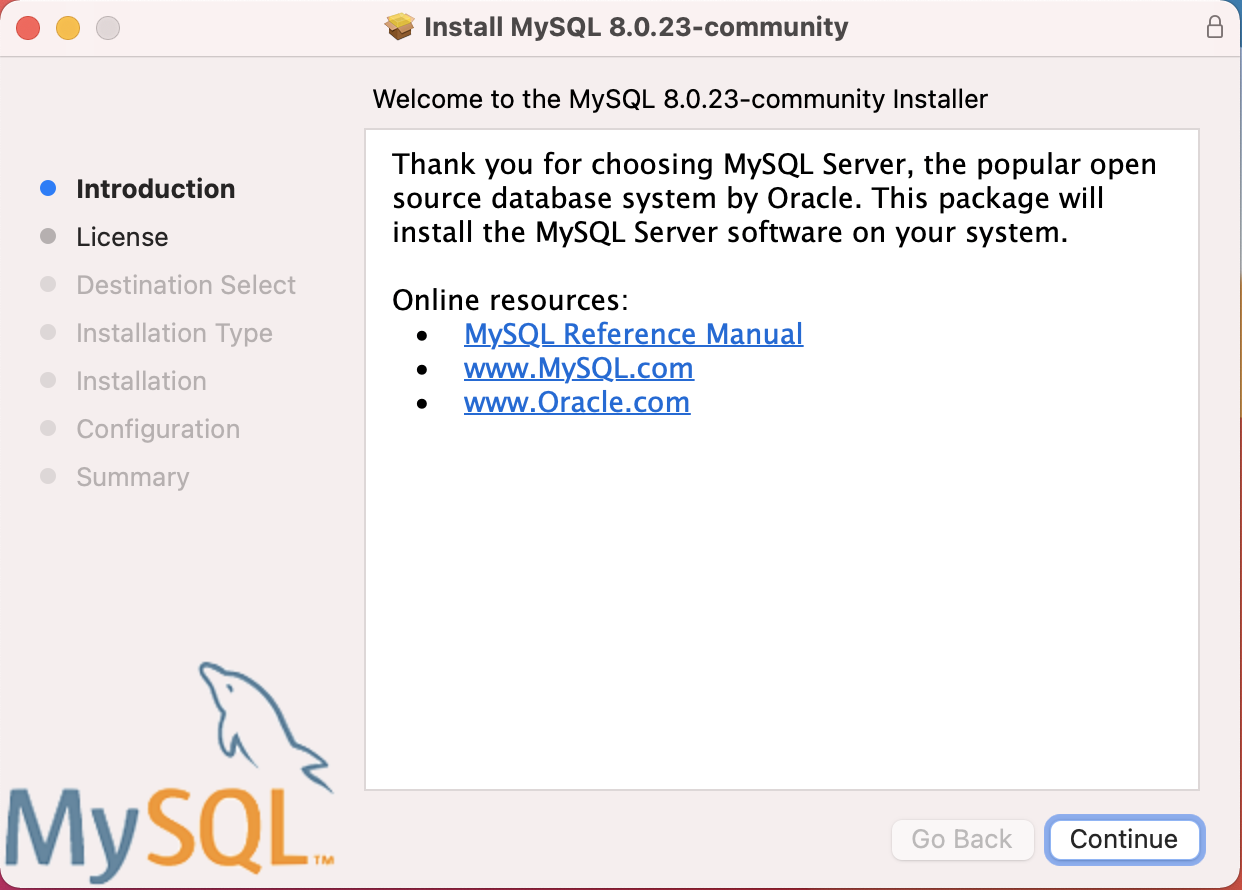 Figure 14. MySql Mac Installer Wizard
 -
Press on continue to agree on the license
-
Specify the desired location or leave it as default in the Installation Type tab then press on Install
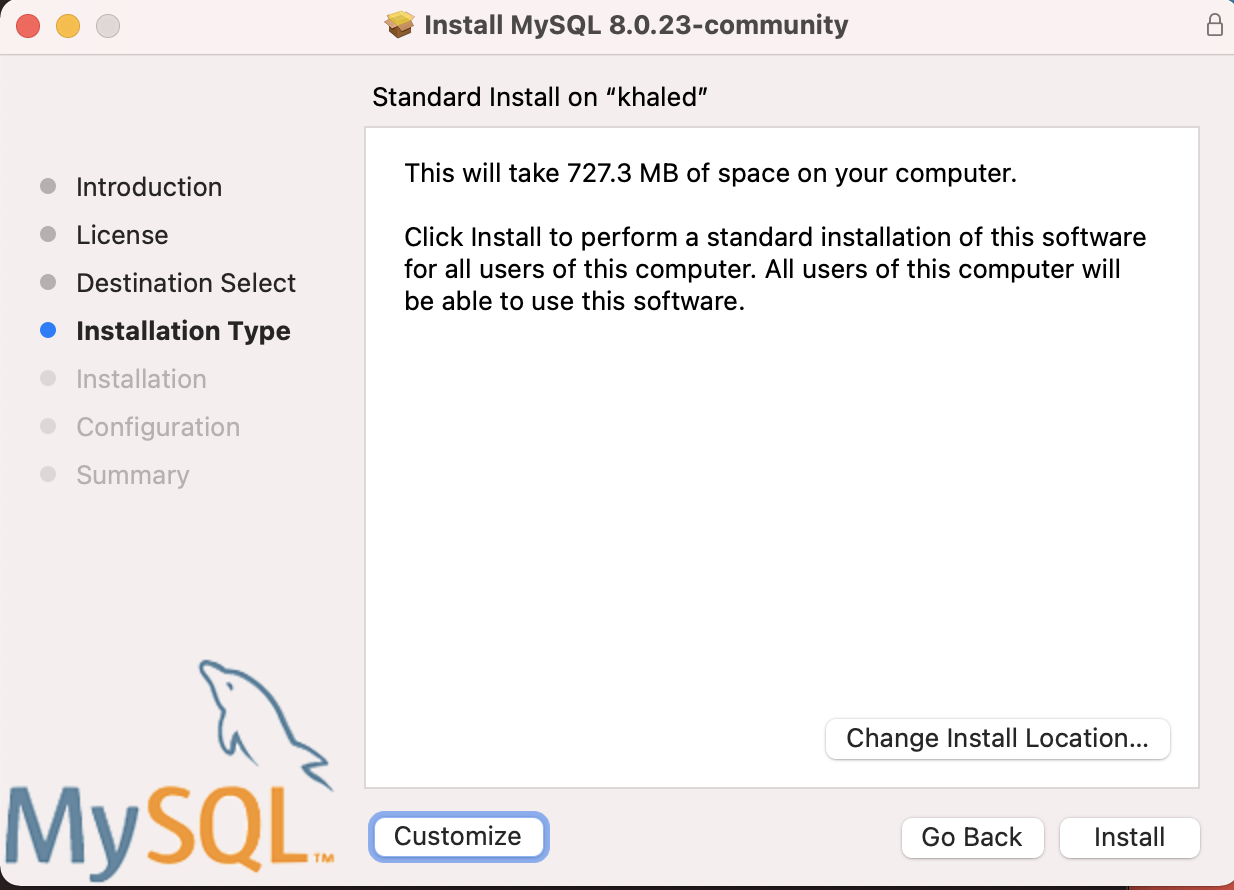 Figure 15. MySql Installation Type Mac
 -
In the configuration tab choose the Password Encryption, we are going to use Strong password encryption.
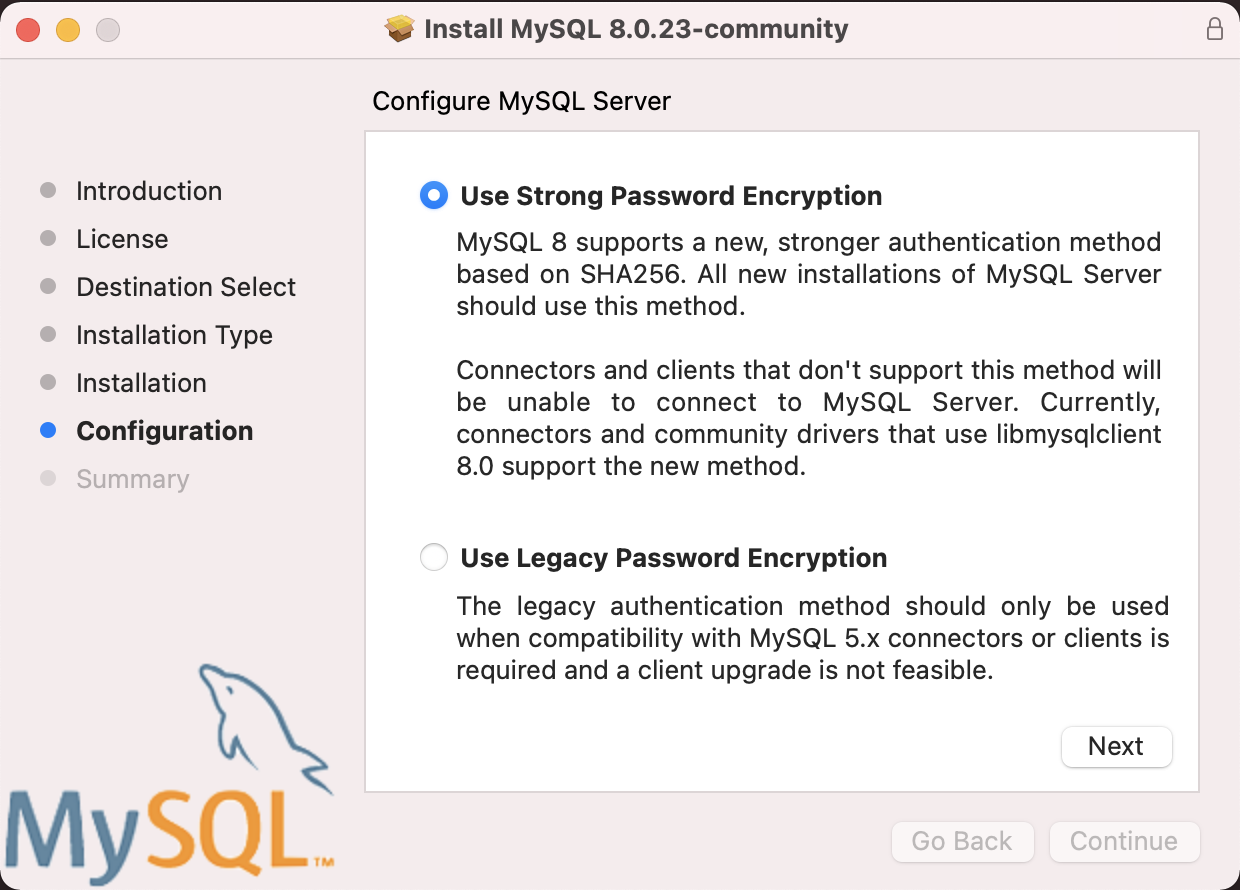 Figure 16. MySql Configuration Mac
 -
Press on next inside the dialog to set the password, then press on finish
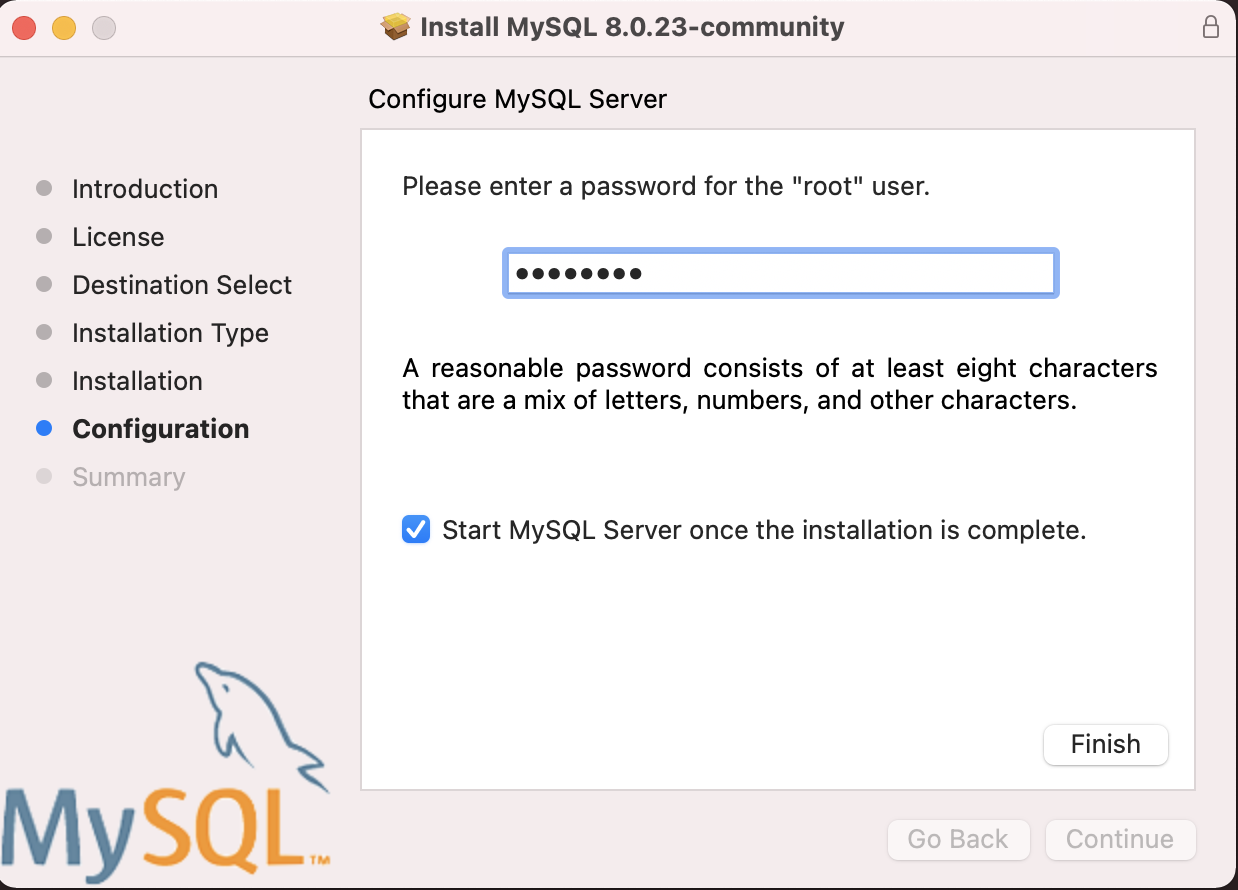 Figure 17. MySql Set Password Mac
 -
Now you have MySQL ready to be used.
Ubuntu
-
Update the list of available packages then install the newer versions of the packages
apt-get update && apt-get upgrade -
Install MySQL
sudo apt install mysql-server -
Configure MySQL Security
sudo mysql_secure_installation -
This will ask you if you want to use VALIDATE PASSWORD COMPONENT, which is used to test your password and improve security. Type (Y) and if you want to use and (N) otherwise
-
Enter a password for the root user
-
Re-enter it
-
press (Y) if you confirm that you want to proceed with the password
-
Run it using the following command
sudo mysql -u root -p -
Enter your root user password and press enter to access the server