Maven
This section includes useful Maven tutorials that could Java developers with their day-day activities.
New Maven project
Prerequisites
-
JDK Installed (JDK 17 or later is recommended)
-
Eclipse Based IDE Installed (We use SpringToolSuite, RedHat CodeReady, and/or Eclipse for JavaEE Developers), of course, you can still use your favorite Java IDE, however, the steps maybe slightly different.
Instructions
-
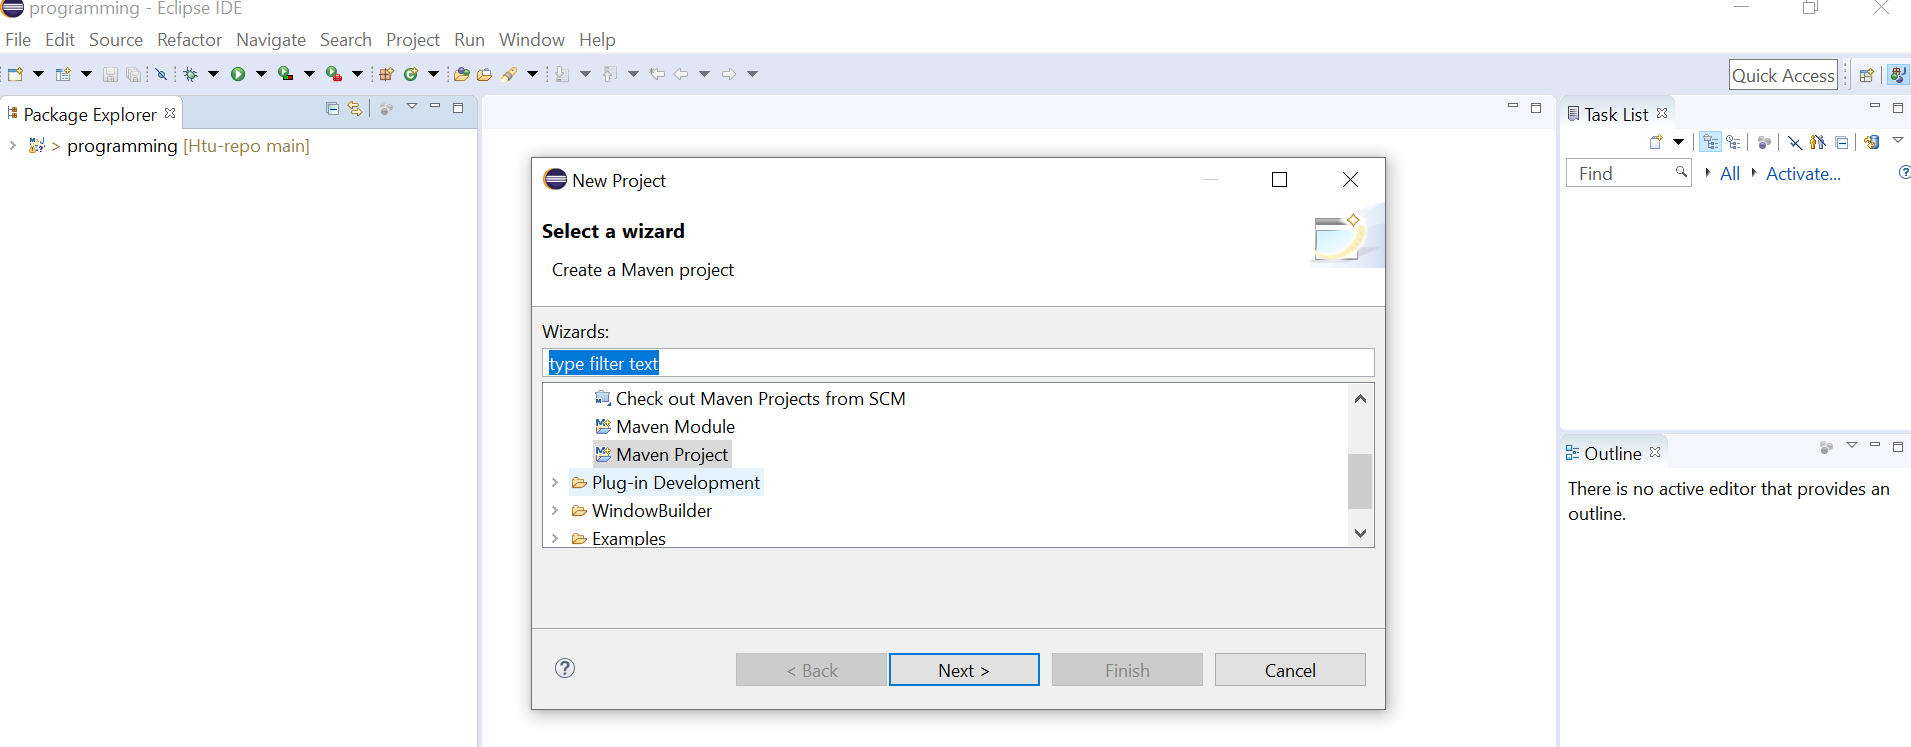
Open Eclipse IDE, Click on File, then New, then Project as in the following screen:

-
In the following screen, select Maven Project and press Next as in the following screen:
-
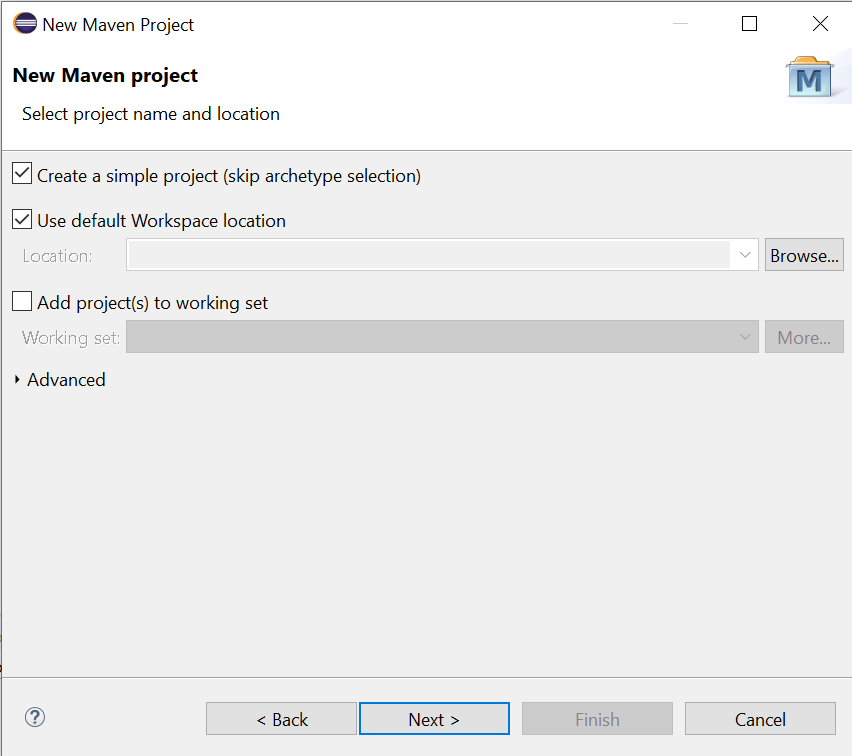
In the following screen, Check Create a simple project (skip archetype selection), then browse the workplace location , then press Next.
-
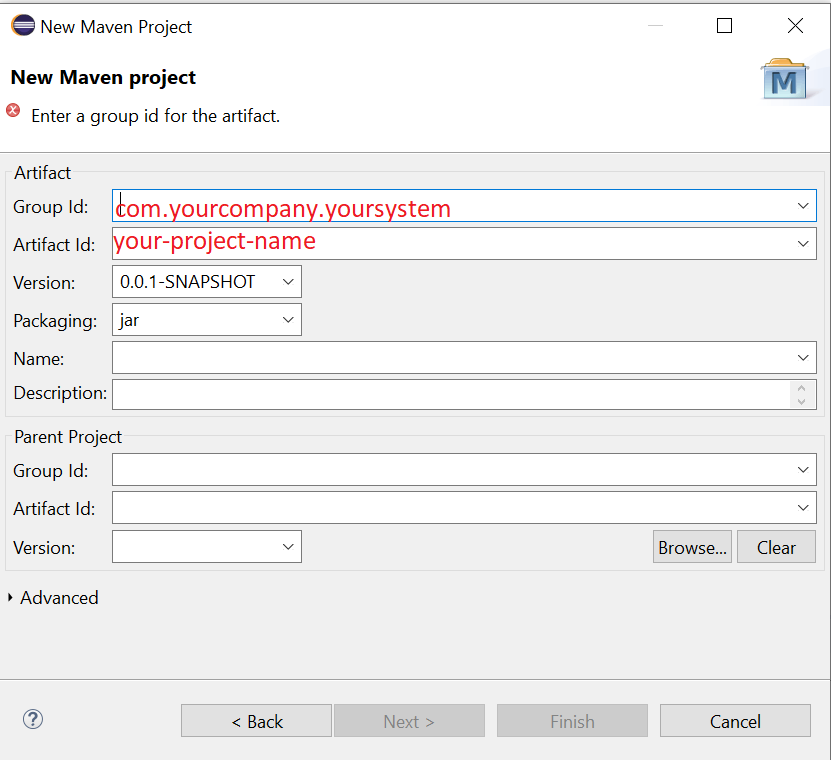
In the following screen, fill in Group Id, artifact Id, select the packaging and press Finish.
-
Group Id: same as your root package name (in my case , it is com.jalalkiswani)
-
Artifact Id: your project name (recommended to be small with dashes)
-
Packaging: the final package type, it could be jar, war, or pom. Jar is the standard for java standalone applications or libraries to create .jar, War is used for web applications to generate .war files
-
-
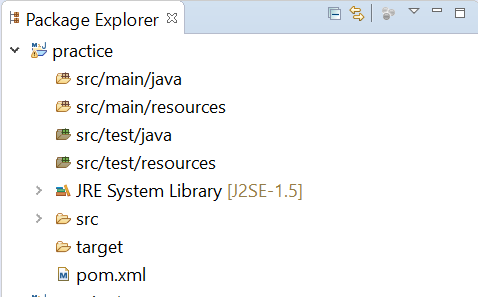
Finally, your Maven project is created, with the following structure.
Set JDK version
Maven by default is configured to compile on JDK 1.5, to force it to use JDK17, you need to add the following
to your pom.xml file:
<build>
	<plugins>
		<plugin>
			<groupId>org.apache.maven.plugins</groupId>
			<artifactId>maven-compiler-plugin</artifactId>
			<version>3.8.1</version>
			<configuration>
				<release>17</release>
			</configuration>
		</plugin>
	</plugins>
</build>
Set Maven to Ignore web.xml
By default, Maven war plugin complains about the availability of web.xml if not found in src/main/webapp/WEB-INF folder,
to fix this, you can add the following config to war plugin:
<build>
	<plugins>
		<plugin>
			<groupId>org.apache.maven.plugins</groupId>
			<artifactId>maven-compiler-plugin</artifactId>
			<version>3.8.1</version>
			<configuration>
				<release>17</release>
			</configuration>
		</plugin>

		<plugin>
			<groupId>org.apache.maven.plugins</groupId>
			<artifactId>maven-war-plugin</artifactId>
			<version>3.3.1</version>
			<configuration>
				<failOnMissingWebXml>false</failOnMissingWebXml>
			</configuration>
		</plugin>
	</plugins>
</build>|
If you are using a Eclipse based IDE, be sure to refresh your project (select your project→ right click→ Maven→ Update Project) |
Maven Runnable Jar
This sections shows how to create a full runnable jar using both, SptingBoot plugin and Maven Shade Plugin
SpringBoot Plugin
Add the following plugin tag in the build→plugins tag of your pom.xml file.
		<plugin>
		<!-- Build an executable JAR -->
		<groupId>org.springframework.boot</groupId>
		<artifactId>spring-boot-maven-plugin</artifactId>
		<executions>
			<execution>
			<goals>
				<goal>repackage</goal>
			</goals>
			<configuration>
				<classifier>full</classifier>
				<mainClass>com.app.Main</mainClass>
			</configuration>
			</execution>
		</executions>
		</plugin>
Maven Shade Plugin
Add the following plugin tag in the build→plugins tag of your pom.xml file.
			<plugin>
				<groupId>org.apache.maven.plugins</groupId>
				<artifactId>maven-shade-plugin</artifactId>
				<version>2.3</version>
				<configuration>
				<createDependencyReducedPom>true</createDependencyReducedPom>
				<filters>
				<filter>
					<artifact>*:*</artifact>
					<excludes>
					<exclude>META-INF/*.SF</exclude>
					<exclude>META-INF/*.DSA</exclude>
					<exclude>META-INF/*.RSA</exclude>
					</excludes>
				</filter>
				</filters>
				</configuration>
				<executions>
					<execution>
					<phase>package</phase>
					<goals>
						<goal>shade</goal>
					</goals>
					<configuration>
						<transformers>
						<transformer
							implementation="org.apache.maven.plugins.shade.resource.ServicesResourceTransformer" />
						<transformer
							implementation="org.apache.maven.plugins.shade.resource.ManifestResourceTransformer">
							<mainClass>com.app.Main</mainClass>
						</transformer>
						</transformers>
					</configuration>
					</execution>
				</executions>
			</plugin>